Widefield Astrophotography: Capturing the Milky Way's Grandeur
The Milky Way, a swirling band of stars and nebulae stretching across the night sky, is a truly breathtaking sight. While deep-sky objects like galaxies and nebulae demand long exposures and powerful telescopes, capturing its immense scale is achievable with a surprisingly simple setup: widefield astrophotography. This guide will explore the techniques and equipment needed to photograph the Milky Way, providing a stunning introduction to night sky photography.
What is Widefield Astrophotography?
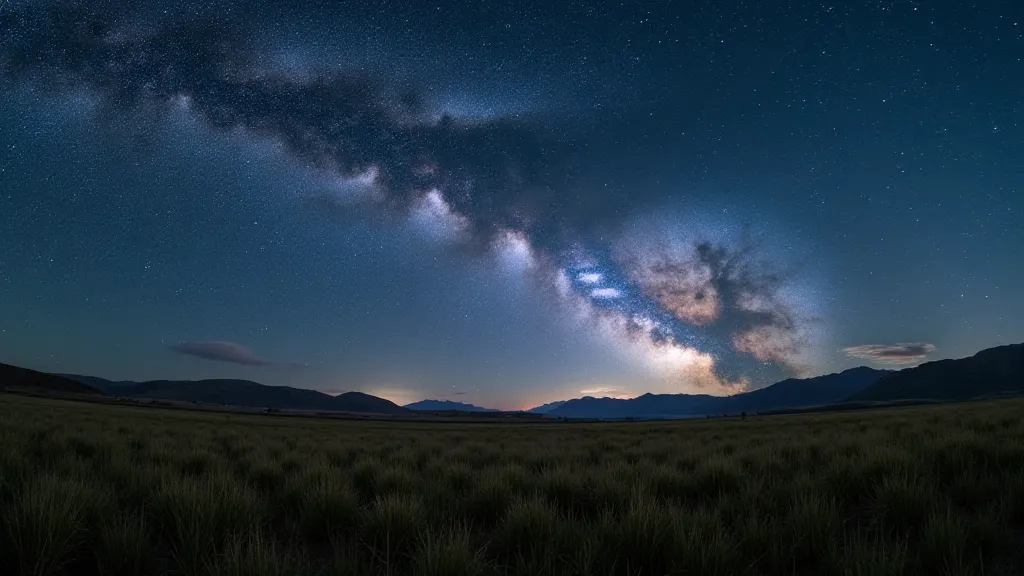
Widefield astrophotography focuses on capturing a broader area of the sky. Unlike deep-sky astrophotography, which uses telephoto lenses or telescopes to magnify distant objects, widefield photography aims to show more of the context—the surrounding landscape, the Milky Way’s arc across the horizon, and the relationship between the cosmos and our planet.
Essential Equipment
You don't need expensive, specialized gear to begin. Here’s a breakdown of what you’ll need:
Mastering the Techniques
Here are the techniques for successful widefield astrophotography:
1. Location, Location, Location
Light pollution is your biggest enemy. Find a dark location, far away from city lights. Apps like Dark Site Finder can help you locate these areas. Clear skies are also paramount—check the weather forecast carefully. Consider that even faint traces of light pollution can severely impact your ability to capture the delicate details within the Milky Way; sometimes, venturing further than you initially plan is necessary to achieve a truly stunning image. For those new to the process, understanding the intricacies of light pollution and its impact on image quality can be a considerable hurdle; however, it's a vital aspect of successful astrophotography.
2. Camera Settings
Shooting Mode: Manual (M)
Aperture: Use the widest aperture your lens allows (e.g., f/2.8, f/1.8).
ISO: Start with ISO 800 or 1600 and adjust based on your results. Higher ISO values increase sensitivity but also introduce more noise.
Shutter Speed: The "500 Rule" is a good starting point: 500 / (Focal Length x Crop Factor) = Maximum Shutter Speed. This prevents star trails. For example, with a 24mm lens on a full-frame camera (no crop factor), the maximum shutter speed would be approximately 20 seconds (500 / 24 = 20.8). Experiment to find what works best. The 500 Rule is a guideline, and depending on your equipment and desired results, it may need to be adjusted. Achieving pinpoint stars requires careful consideration of these factors. If you find yourself struggling to reduce noise while maintaining sharp stars, you might also consider the advantages of image stacking, a technique explained further below.
Focus: Achieving sharp focus on stars is tricky. Live View with magnification is your best friend. Focus on a bright star and zoom in to confirm sharpness. Manual focus is essential. The challenge of obtaining focus on distant stars can be frustrating for beginners, but mastering this skill is crucial for sharp, detailed images. For more advanced techniques for capturing specific celestial objects, you may also want to look into planet imaging, which requires specialized techniques and equipment.
3. Composition and Framing
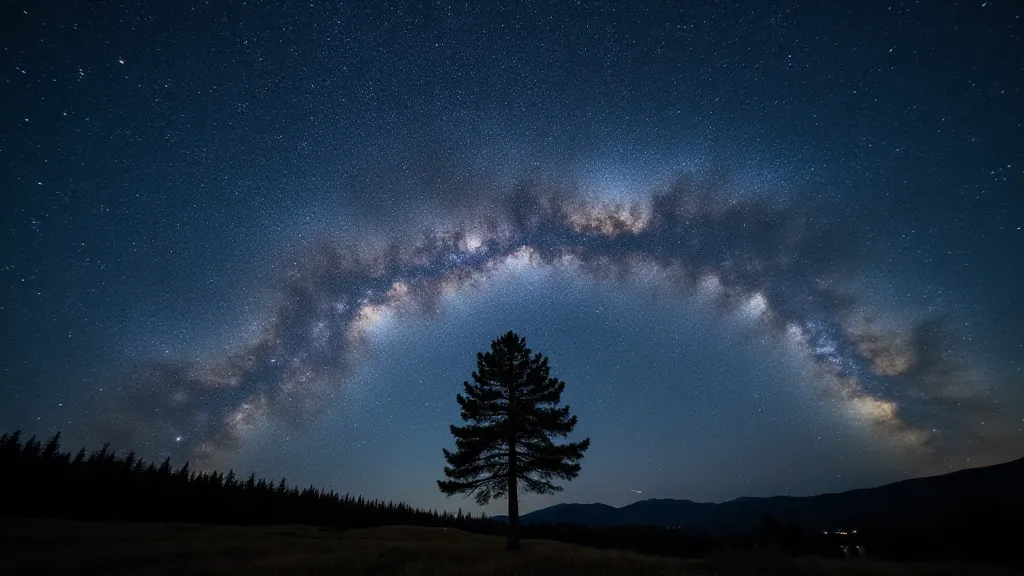
Consider the foreground. Including interesting landscape elements like trees, mountains, or rock formations adds context and scale to your image. Think about the Milky Way's arc and how it complements the foreground. Often, the most compelling images result from the careful placement of foreground elements to create a sense of depth and perspective. Experiment with different compositions to find what works best for your vision.
4. Image Stacking (Optional)
Stacking multiple exposures reduces noise and brings out fainter details. Software like Sequator (free) or DeepSkyStacker (free) makes this process relatively straightforward. The beauty of image stacking lies in its ability to transform raw data into stunningly detailed images. While it might seem daunting at first, the results are well worth the effort. You’re essentially accumulating more light over time, allowing you to reveal details that would otherwise remain hidden in a single exposure.
Post-Processing: Bringing Out the Beauty
Post-processing is a critical step in the astrophotography workflow. It’s where you refine your images, enhance details, and correct any imperfections. Software like Adobe Lightroom, Photoshop, or Affinity Photo provides a wide range of tools for achieving these results. While it’s possible to capture acceptable images straight out of the camera, post-processing allows you to truly unlock the potential of your images.
Key adjustments often include:

The techniques used in post-processing can be quite complex, involving adjustments to curves, levels, and color channels. However, even basic adjustments can significantly improve the appearance of your images. Those new to the process might find it helpful to start with simple adjustments and gradually work their way up to more advanced techniques. For those looking for a deeper understanding of astrophotography post-processing workflows, you might also want to explore resources dedicated to post-processing astrophotography images.
Advanced Techniques and Considerations
Once you've mastered the basics of widefield astrophotography, there are numerous advanced techniques you can explore to elevate your results. These techniques often require specialized equipment and a deeper understanding of the underlying principles of astrophotography.
Dithering: Dithering is a technique used to reduce the impact of fixed-pattern noise and hot pixels. It involves slightly shifting the camera position between exposures, which effectively spreads the noise across the image. Software like DeepSkyStacker can automatically apply dithering during the image stacking process.
Ha and Narrowband Imaging: For capturing even fainter details within the Milky Way, consider exploring Ha (Hydrogen-alpha) and other narrowband imaging techniques. These techniques require specialized filters that block out unwanted light pollution, allowing you to capture the emission from specific elements within the nebula.
Time-Lapse Astrophotography: Combining widefield astrophotography with time-lapse techniques can create stunning videos that showcase the movement of the night sky. This requires careful planning and execution, but the results can be truly captivating.
The Importance of Careful Planning: Successful astrophotography requires careful planning and preparation. This includes researching your location, checking the weather forecast, and ensuring that your equipment is in good working order. Don't underestimate the importance of scouting your location in advance. Finding a dark sky location and understanding the surrounding landscape can significantly improve your chances of capturing a stunning image.
Final Thoughts
Widefield astrophotography is a rewarding pursuit that combines artistic vision with technical skill. By following these tips and experimenting with different techniques, you can capture stunning images of the Milky Way and share its grandeur with the world. Don’t be afraid to fail – every shot is a learning opportunity! Remember that patience and perseverance are key to success in astrophotography. It takes time and effort to master the techniques and equipment, but the rewards are well worth it. And while this guide focuses on widefield techniques, for those interested in capturing the beauty of our celestial neighbor, you may also want to look into lunar astrophotography.